Creating a New Decode Table
Creating a Table is the first step towards organizing and analyzing your insurance data within Decode. This process involves defining the structure (schema) that will hold your cleaned data. You'll use a multi-step form to specify the table type, time period (for Time Series tables), and the different types of columns your table will contain.
Accessing the Create Table Form
- Navigate to the Data Page.
- Locate and click the "Create New Table" button (displayed as a plus icon at the top of the left sidebar). This will open the multi-step table creation form.
Step 1: Basic Information
This step captures the fundamental details about your table, including its type.
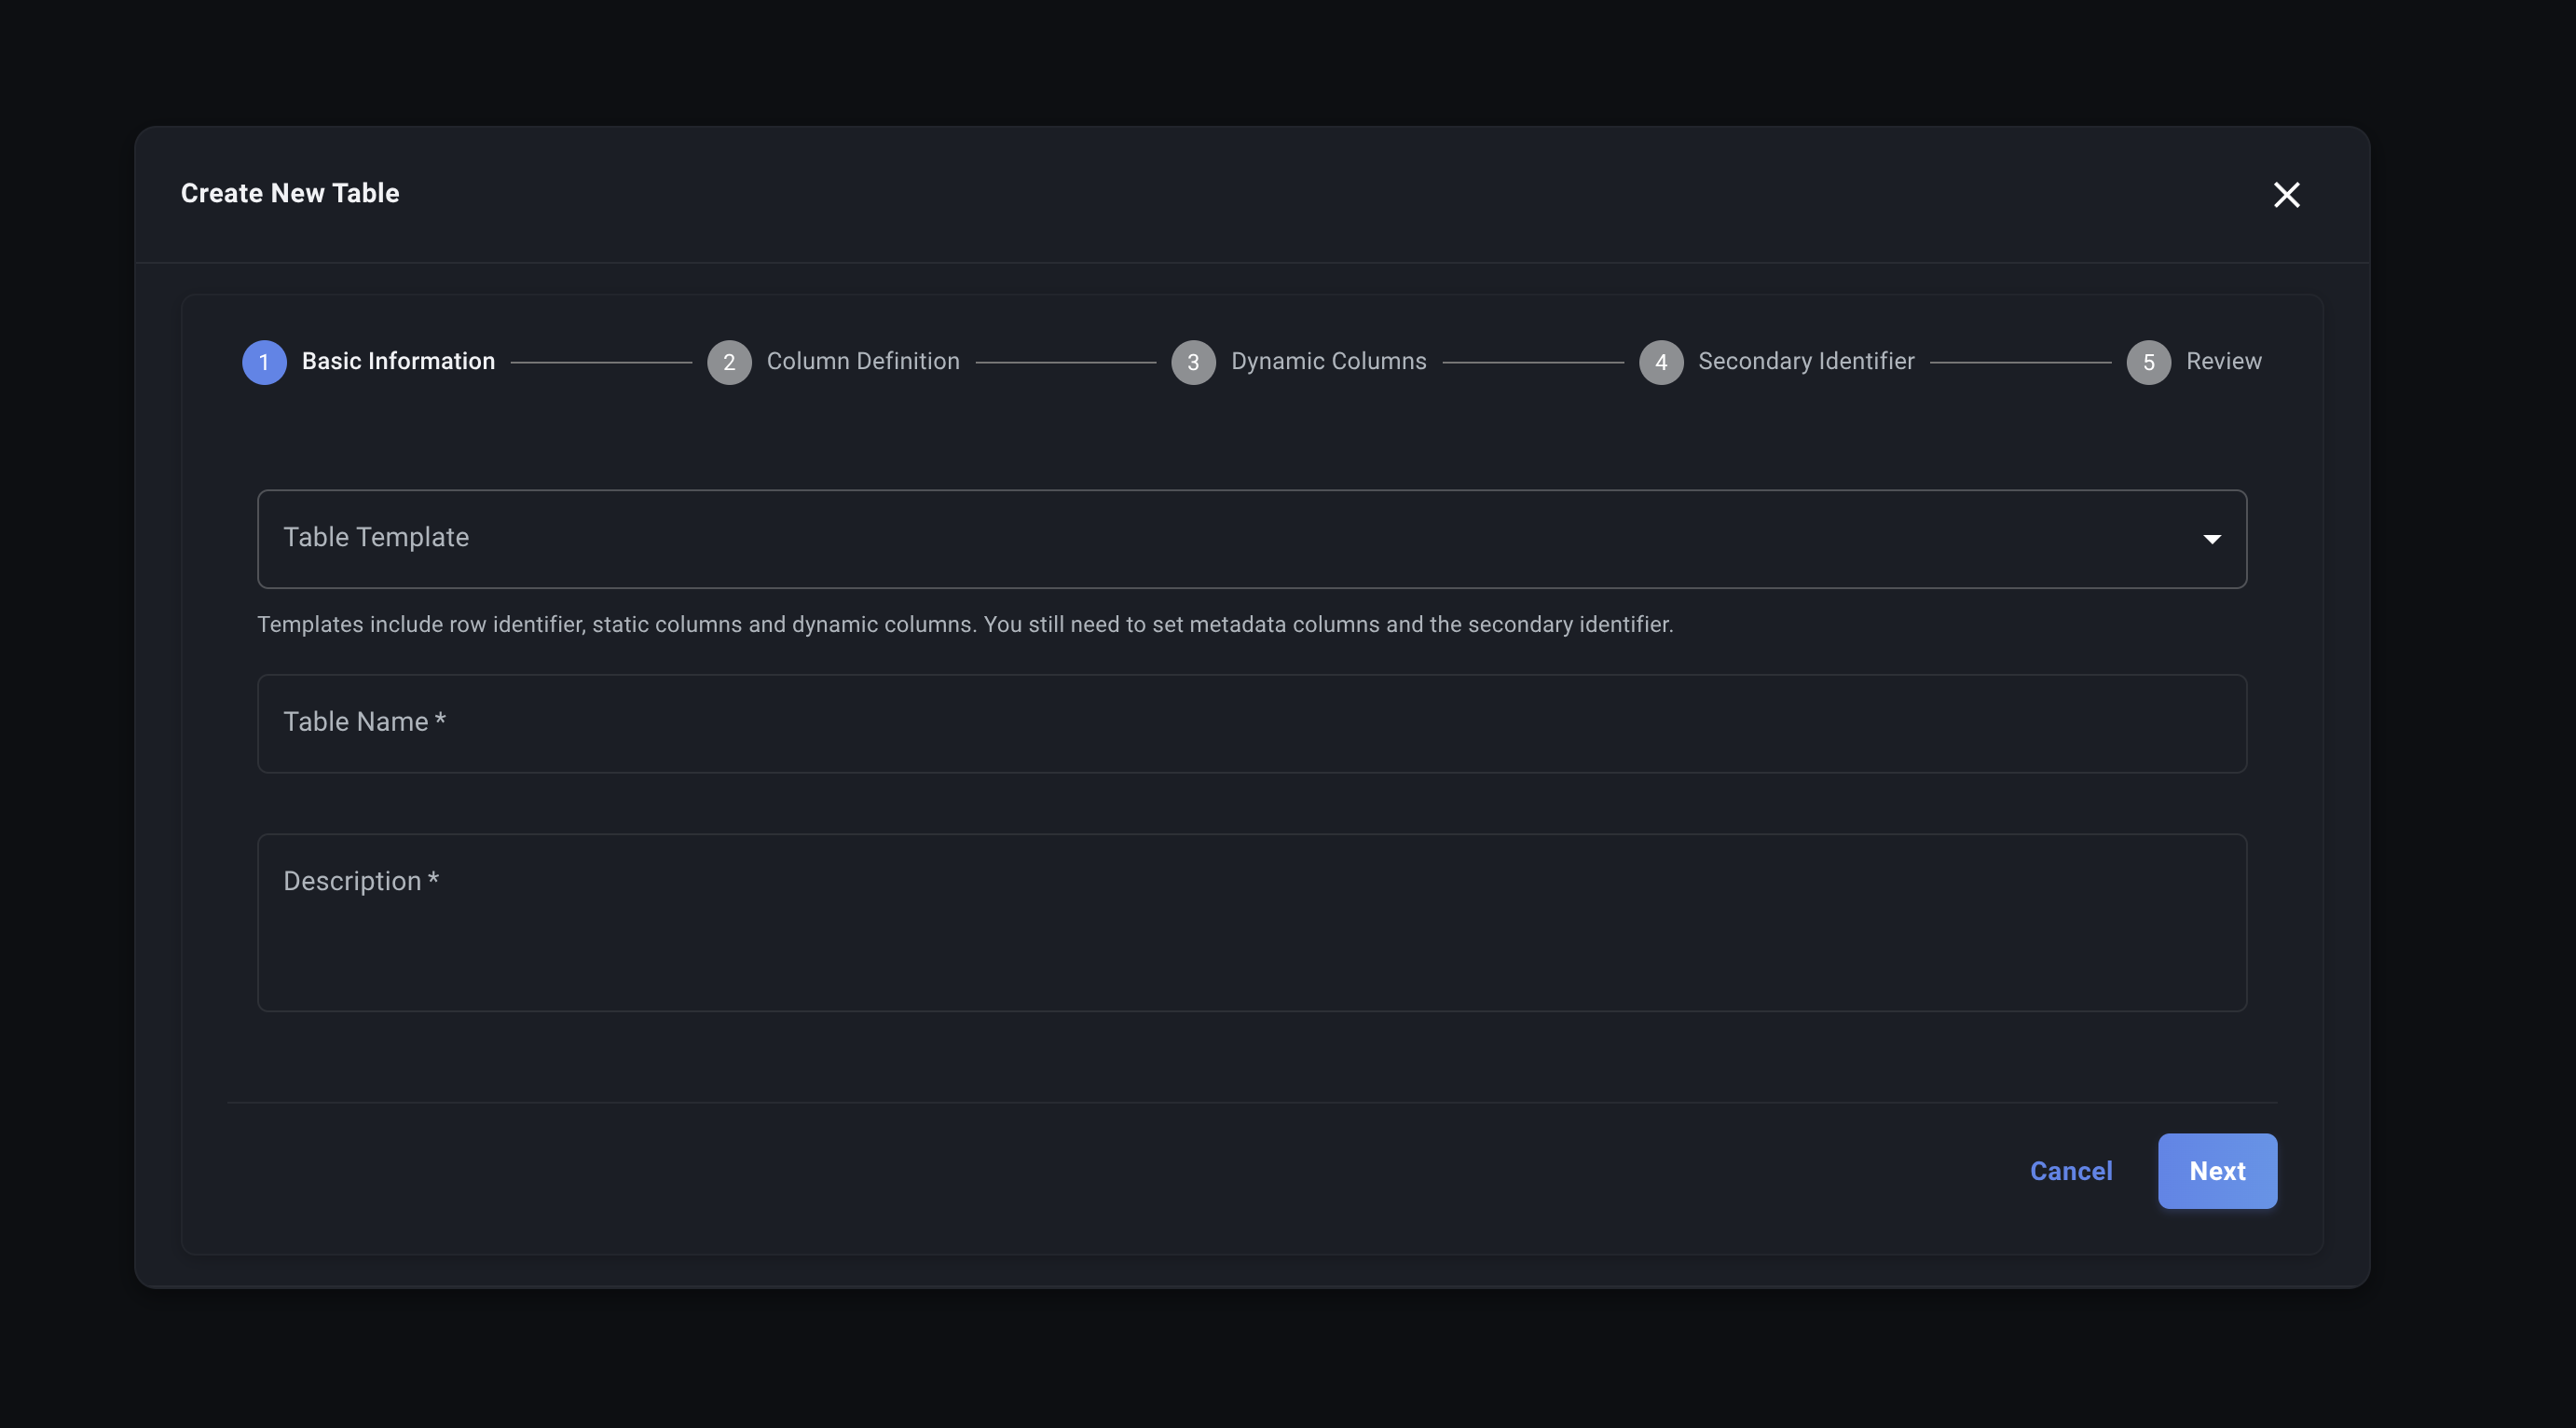
Table Type
Choose how your data will be structured:
- Time Series (Periodic Data): For data that grows both vertically (new rows) and horizontally (new time period columns). Use this for bordereaux, financial tracking, or any data reported periodically.
- Records (Static Data): For flat data that grows only vertically (new entries). Use this for payment ledgers, entity registries, or transaction logs.
Time Period (Time Series Tables Only)
If you selected Time Series, choose the time granularity for your data:
| Period | Format | Example | Best For |
|---|---|---|---|
| Daily | YYYY_MM_DD | 2024_01_15 | Daily transaction tracking |
| Monthly | YYYY_MM | 2024_01 | Monthly bordereaux (most common) |
| Quarterly | YYYY_QN | 2024_Q1 | Quarterly reporting |
| Yearly | YYYY | 2024 | Annual summaries |
Other Fields
- Table Name: Enter a descriptive name for your table (e.g., "US Property Premiums", "Commercial Auto Claims"). This is the name you'll see in the Decode interface.
- Description: Provide an explanation of what data this table holds. This helps you, your team, and Decode understand its purpose later (e.g., "Monthly premium bordereaux data for US property policies underwritten via Wholesaler X"). Detail about the data and how it will be stored is important here as it provides more context for the Decode Agent and function building AI (e.g., "Monthly columns contain the status of a claim at a given time, rather than the incoming/outgoing").
- (Optional) Import Template: This allows you to import a predefined template for your data. This template can be edited to match your needs, but provides a strong starting point.
Click "Next" to proceed.
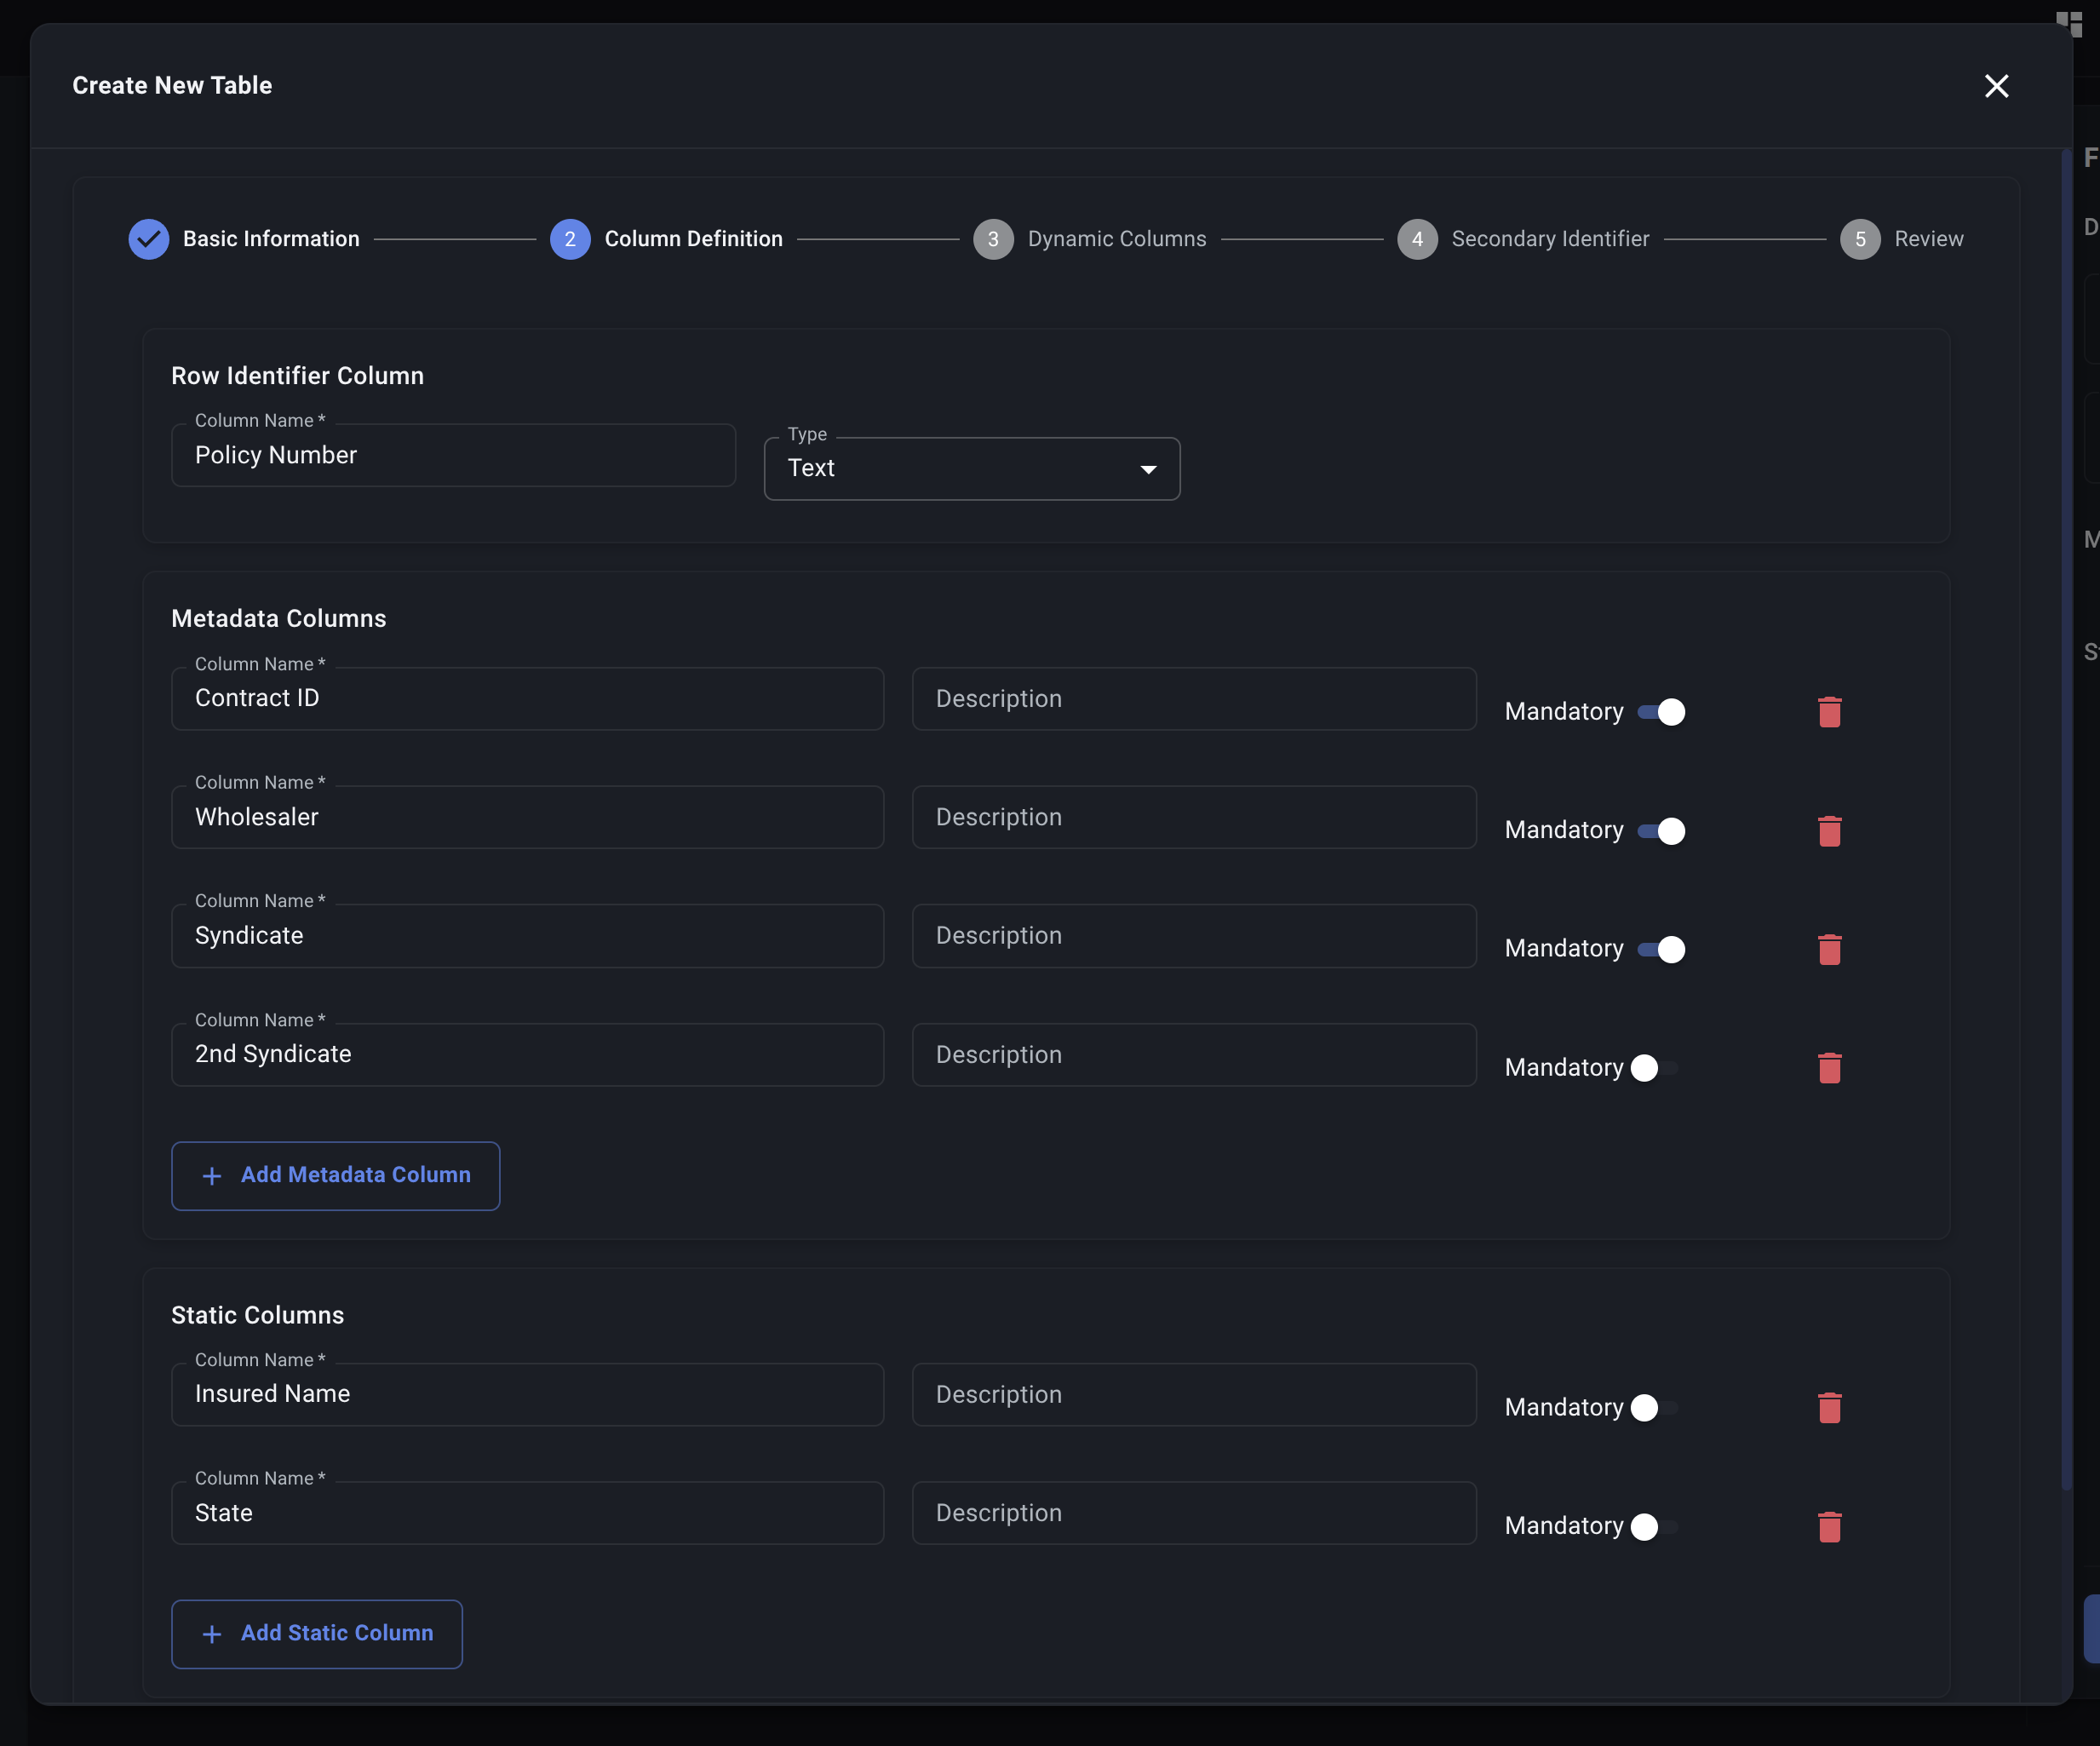
Step 2: Column Definition
This is where you define the core structure: the Identifier, Attribute columns, and Detail columns.
Identifier
This is the most important column you will define.
- What it is: The single column that uniquely identifies each row in your table (e.g., each distinct policy or claim).
- Why it matters: Decode uses this identifier to track records over time. When you upload new data, Decode checks this column to see if a row represents an update to an existing record or if it's a brand new record.
- Fields:
- Column Name: Enter the exact name of the column in your typical spreadsheets that contains this unique identifier (e.g.,
Policy Number,Claim ID). Crucially, this column MUST exist in the files you plan to upload.
- Column Name: Enter the exact name of the column in your typical spreadsheets that contains this unique identifier (e.g.,
Attribute Columns
These columns allow you to add contextual information or tags during the upload process. The data for these columns does not need to be present in the uploaded spreadsheet itself.
- Fields:
- Column Name: Select an existing attribute category from the dropdown.
- Description (Optional): Explain what this tag represents.
- Mandatory: Check this box if a value must be provided for this tag during every file upload to this table. Uploads will fail if a mandatory attribute tag is missing.
- Adding/Deleting: Use the "Add Attribute Column" button to add more rows and the Delete icon to remove them.
Detail Columns
These columns represent attributes of your records that generally don't change from one reporting period to the next.
- Fields:
- Column Name: The name of the column as it often appears in your spreadsheets (e.g.,
Insured Name,Policy State,Coverage Type). - Description (Optional): Explain the column's content.
- Mandatory: Check this box if this column must be present and have a value in every uploaded file destined for this table. If data is missing for a mandatory detail column in any row of an uploaded file, the file processing will fail.
- Column Name: The name of the column as it often appears in your spreadsheets (e.g.,
- Adding/Deleting: Use the "Add Detail Column" button and the Delete icon as needed.
Click "Next" when you have defined these columns.
Step 3: Metric Columns (Time Series Tables Only)
This section is for defining the metrics that will be tracked for each time period. This step only appears for Time Series tables.
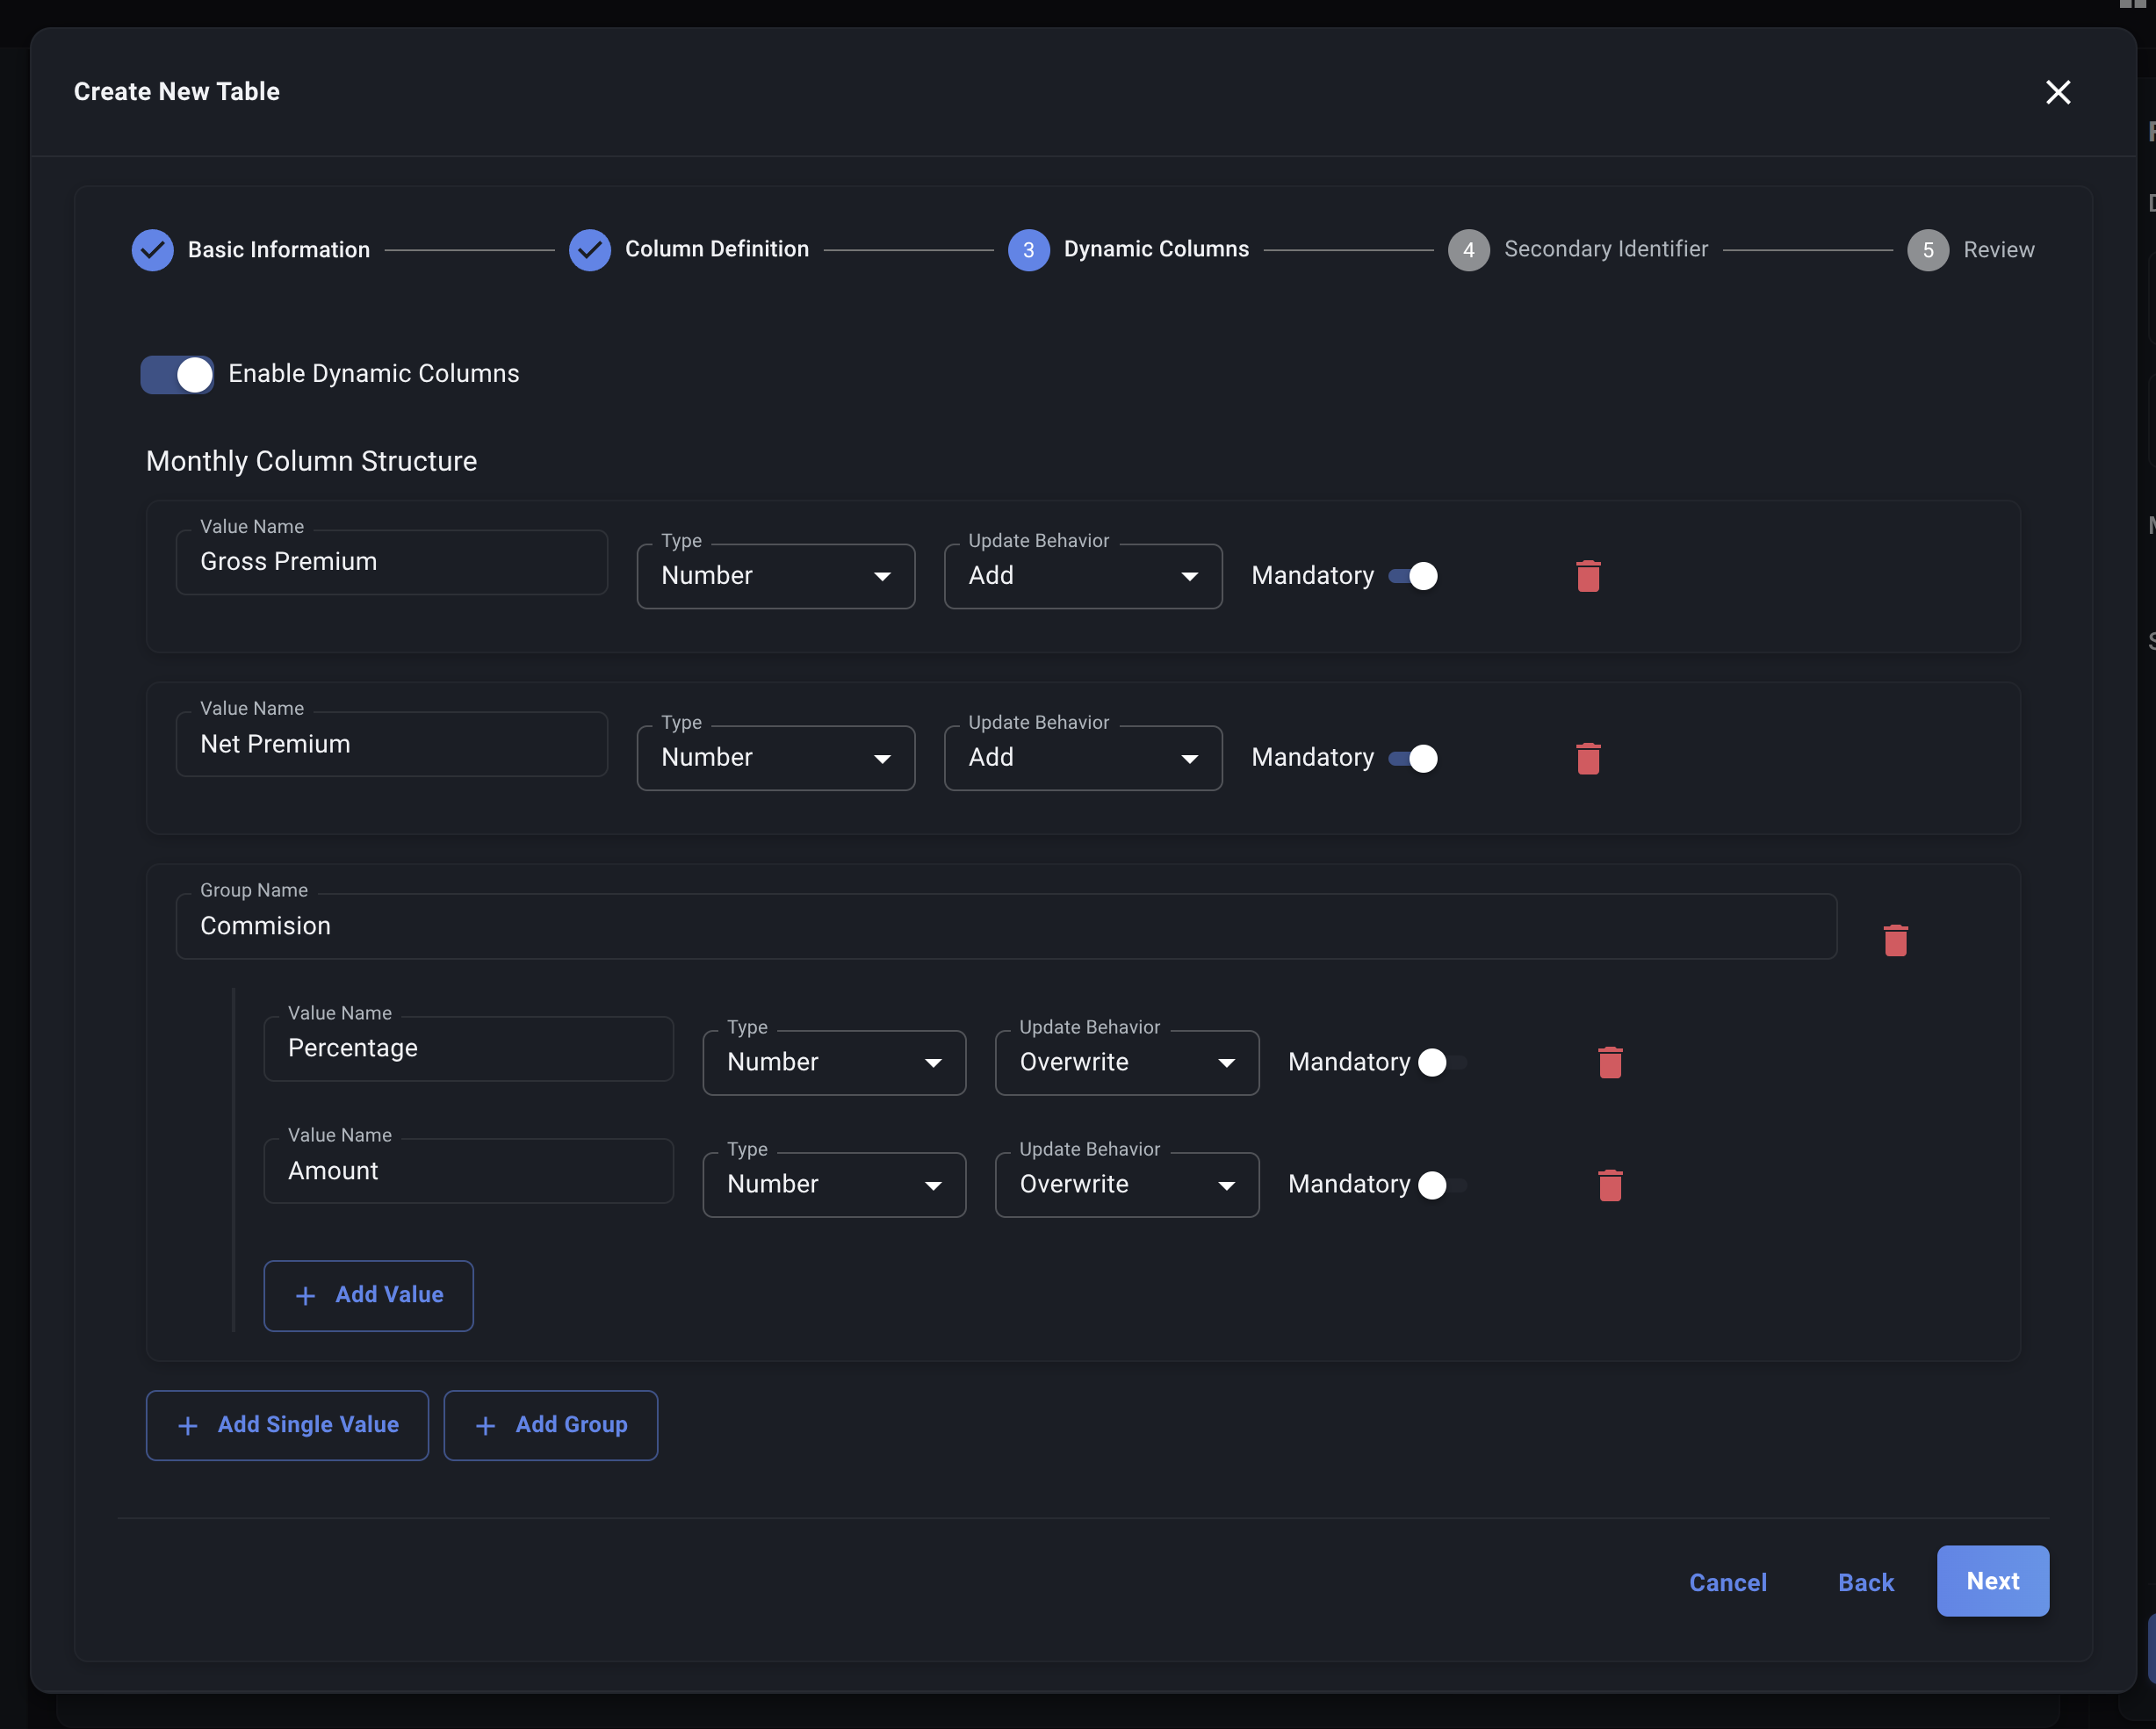
- Structure Definition: Define the template for the data that will be stored for each period. Decode will automatically create new columns based on this template as data for new periods arrives.
- Adding Values/Groups: You can define:
- Single Values: Direct metrics for the period (e.g.,
Gross Premium Reported). - Groups: Collections of related metrics (e.g., a
Financialsgroup containingGross Premium,Commission,Net Premium). This helps organize complex periodic data.
- Single Values: Direct metrics for the period (e.g.,
- Fields (for each value/nested value):
- Name: The name of the specific metric (e.g.,
Paid Claims). - Update Behavior: How should Decode handle this value if it already exists for a given record and period?
Overwrite: Replace the old value with the new one (default).Add: Add the new value to the existing value (useful for cumulative numbers).Subtract: Subtract the new value from the existing value.
- Mandatory: Must this specific metric be present in the data for every period?
- Name: The name of the specific metric (e.g.,
- Adding/Deleting: Use the "Add Single Value", "Add Group", and delete icons within the builder interface.
- Adding Values/Groups: You can define:
If you selected Records as your table type, this step is skipped as Records tables do not have time-indexed metric columns. All data fields for Records tables should be defined as Detail columns in Step 2.
Click "Next" to proceed.
Step 4: Secondary Identifier
This step is simple but important. For each table you must select a secondary identifier. This is used by Decode to prepend to the identifier if the value for a given spreadsheet is too simple and may cause clashes with other data.
Example:
| Policy Number | Contract ID | Other Data ... |
|---|---|---|
| 01 | 20021 | .... |
| 02 | 20021 | .... |
With the secondary identifier set to Contract ID, Decode will ingest the data by setting the data like so:
| Policy Number | Contract ID | Other Data ... |
|---|---|---|
| 20021-01 | 20021 | .... |
| 20021-02 | 20021 | .... |
in the database. This is crucial for prevent clashes between rows that are not actually the same.
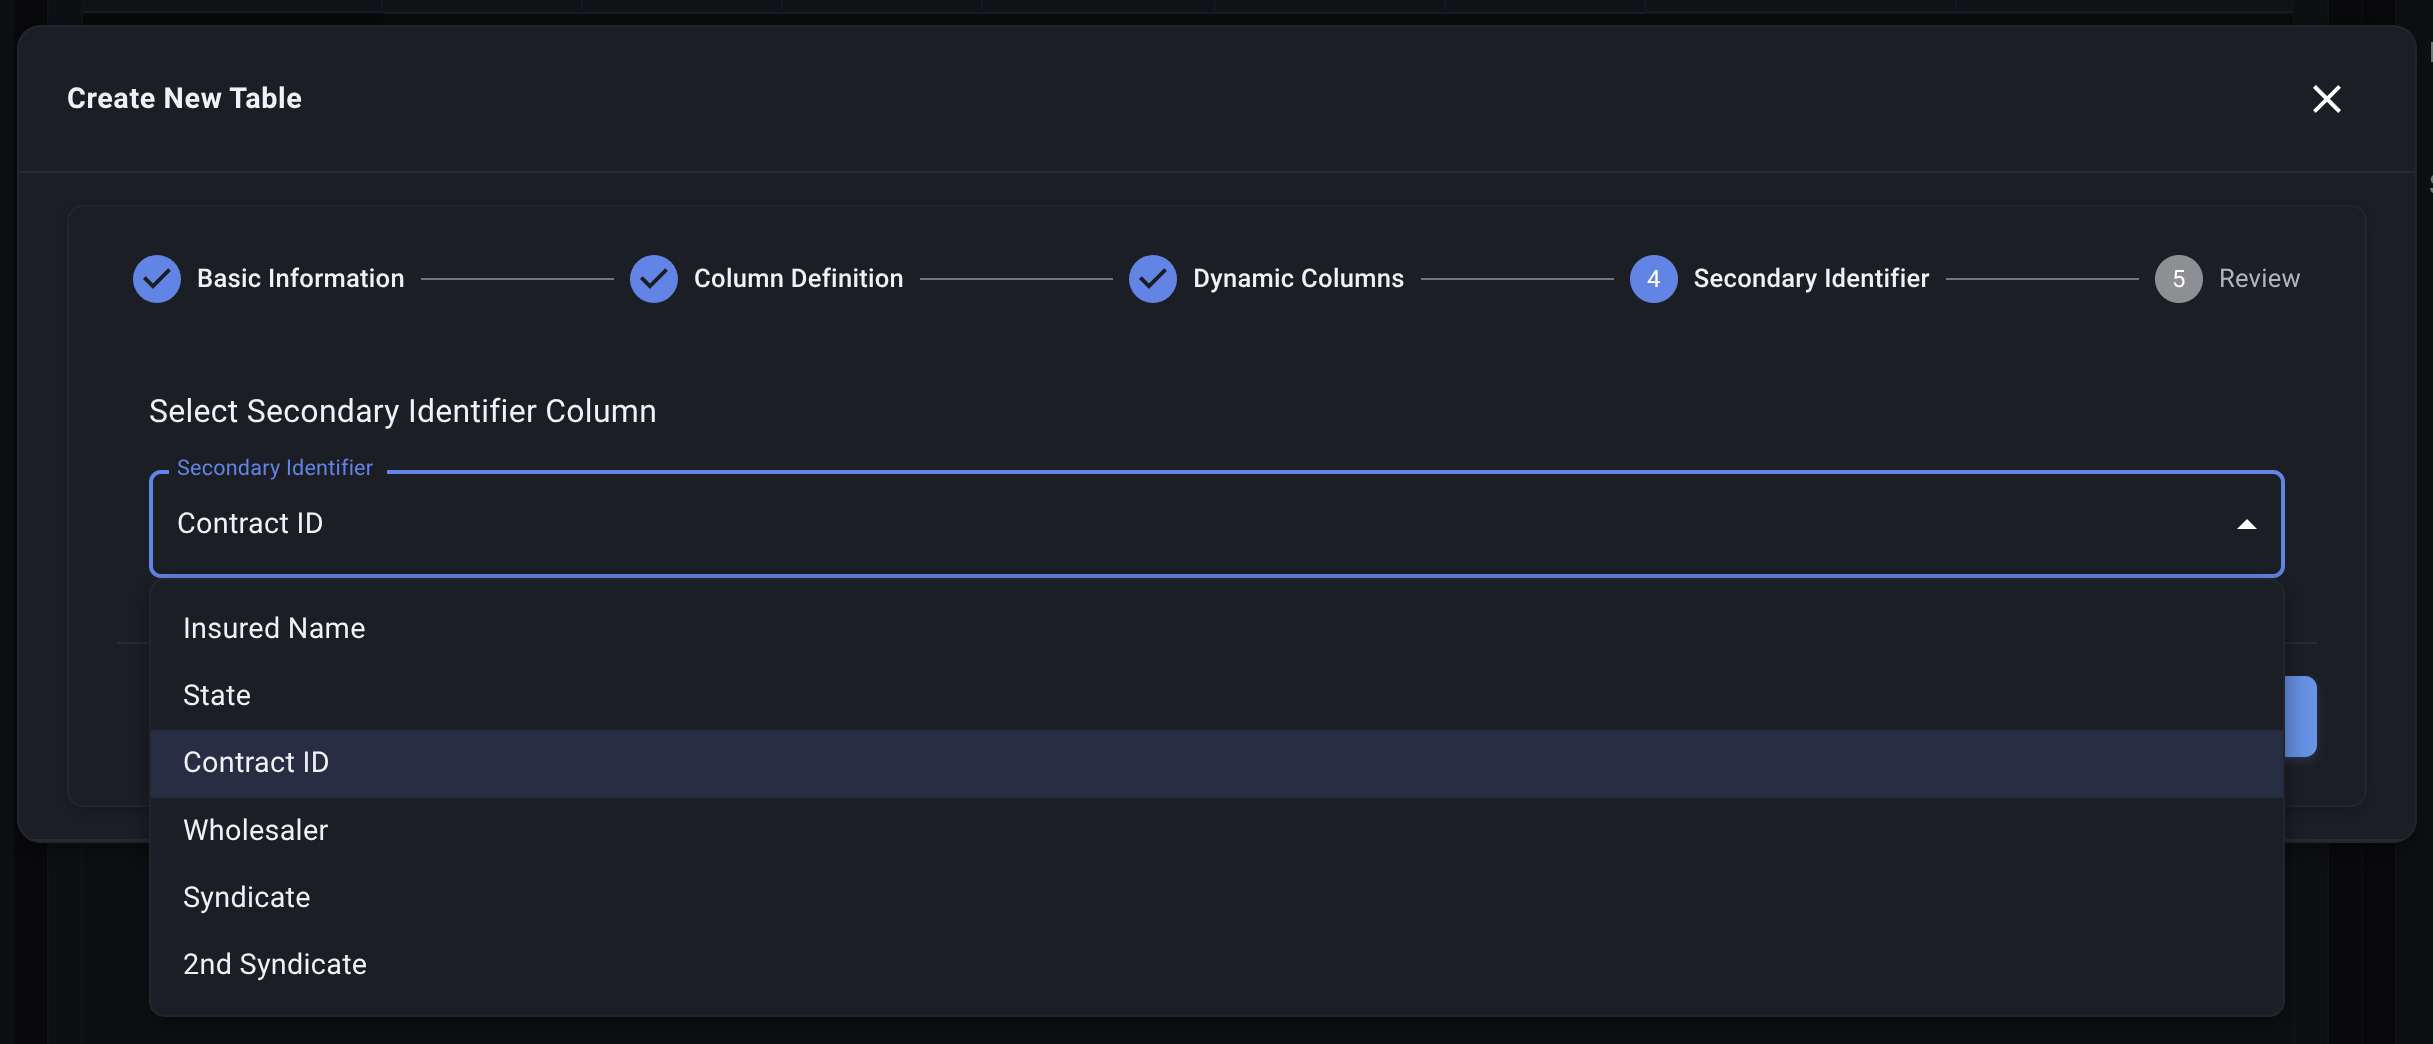
Note: Any identifier less than 5 characters long is considered too simple, and will have the secondary identifier prepended to ensure safety.
Step 5: Review
This final step displays a preview of the complete table schema you have just defined.
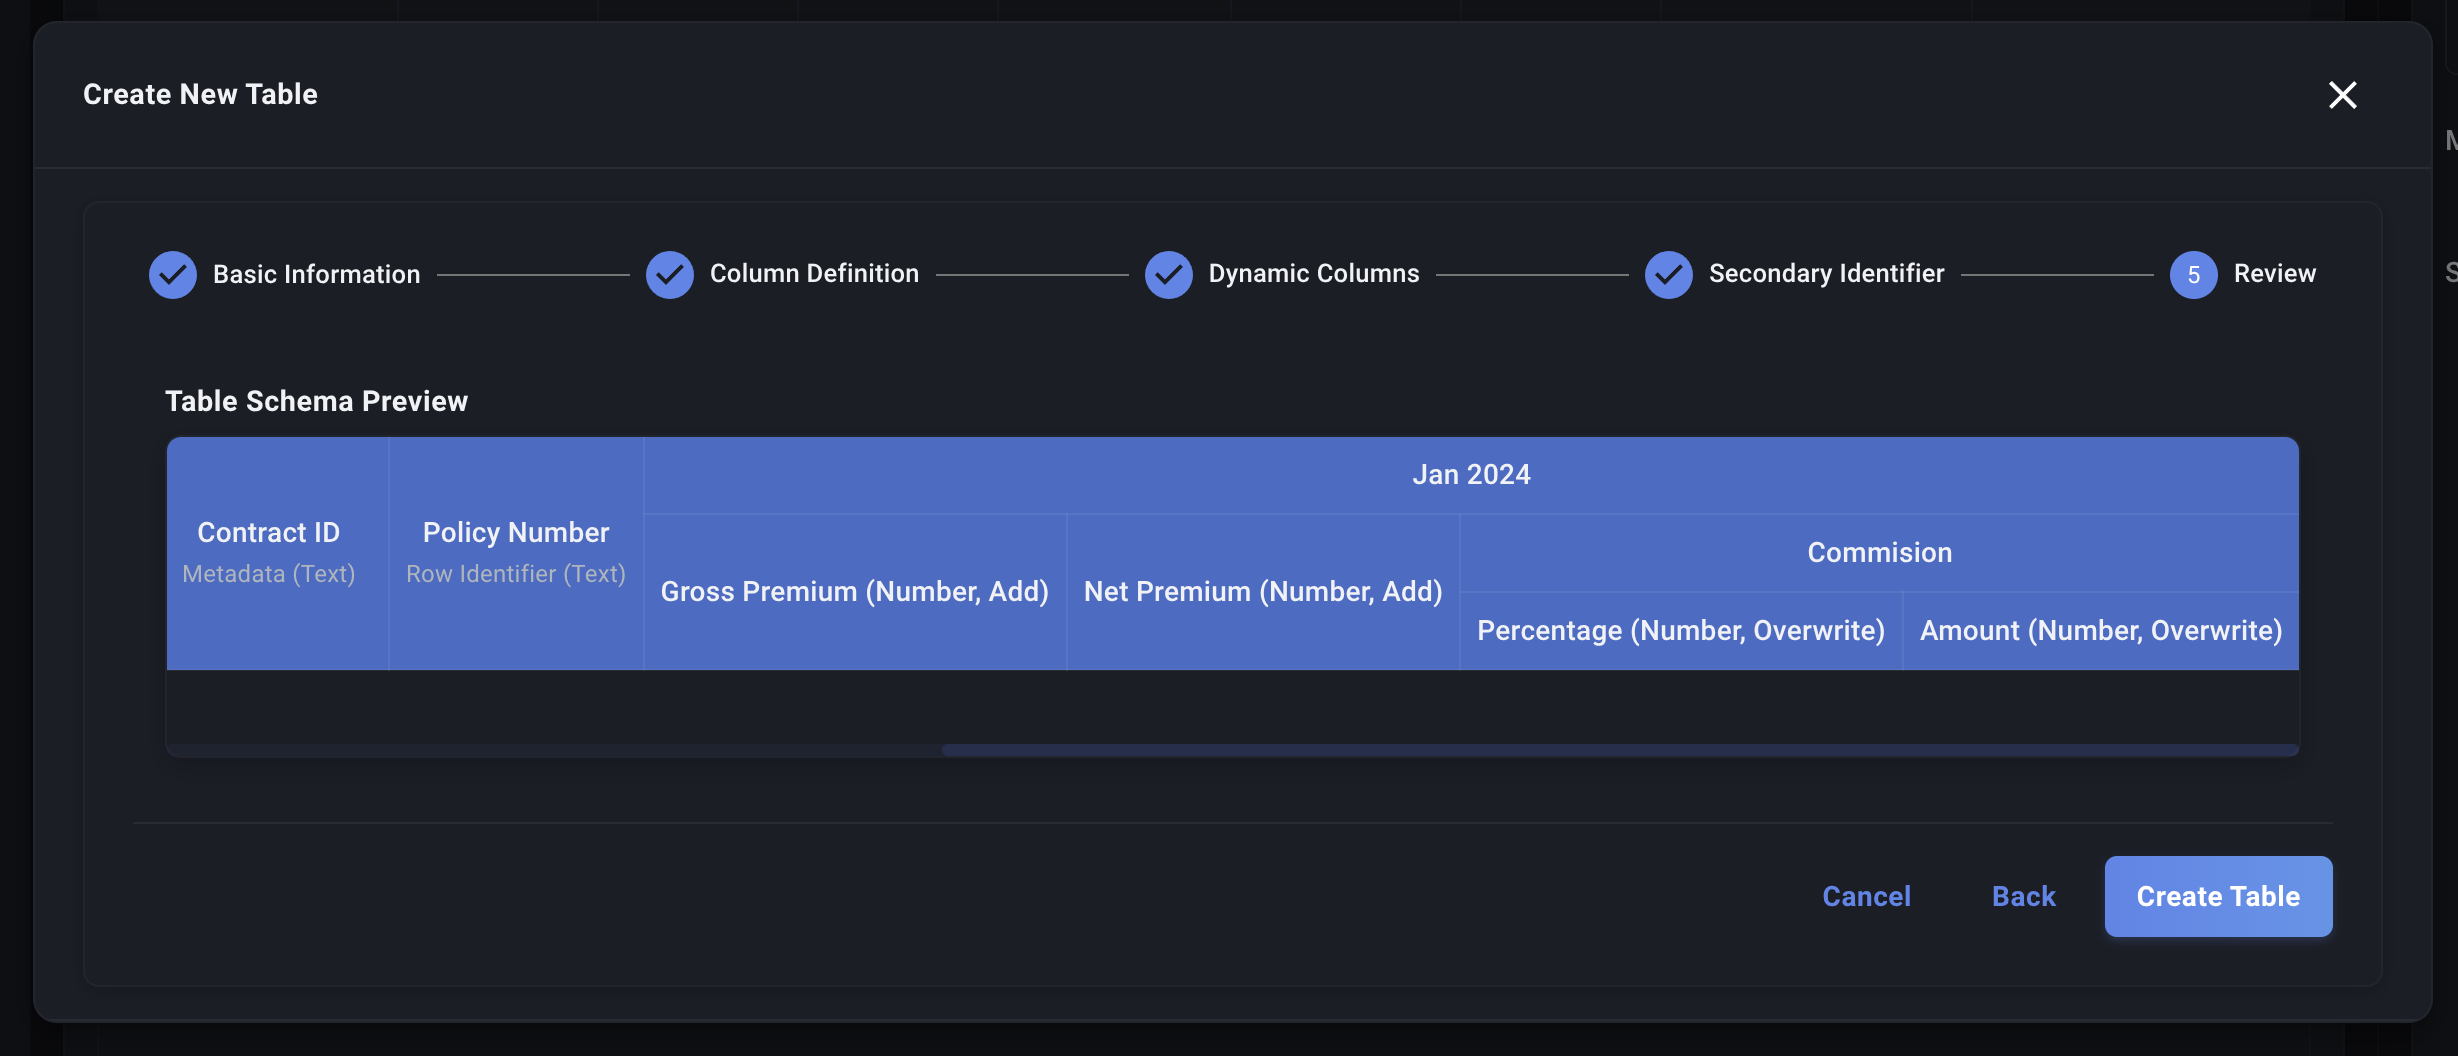
- Carefully Review: Double-check all column names, types, mandatory settings, and the metric column structure (for Time Series tables). Ensure the Identifier is correct.
- Go Back if Needed: Use the "Back" button to navigate to previous steps and make corrections.
Creating the Table
Once you are satisfied with the schema preview:
- Click the "Create Table" button.
- Decode will now:
- Create the corresponding table.
- Save the table definition (schema, attributes) in our database.
- Make the new table available on the Data Page sidebar.
Congratulations! Your table is now ready. You can proceed to manage Attributes, create Data Profiles, or start uploading data to it.