Building a View
Creating a View allows you to design a custom dashboard layout featuring the outputs of your finalized Data Functions.
Starting the View Builder
- Navigate to the Dashboard Page.
- Ensure the "Views" tab is selected in the left sidebar.
- Click the "New View" button.
- This opens the View Builder.

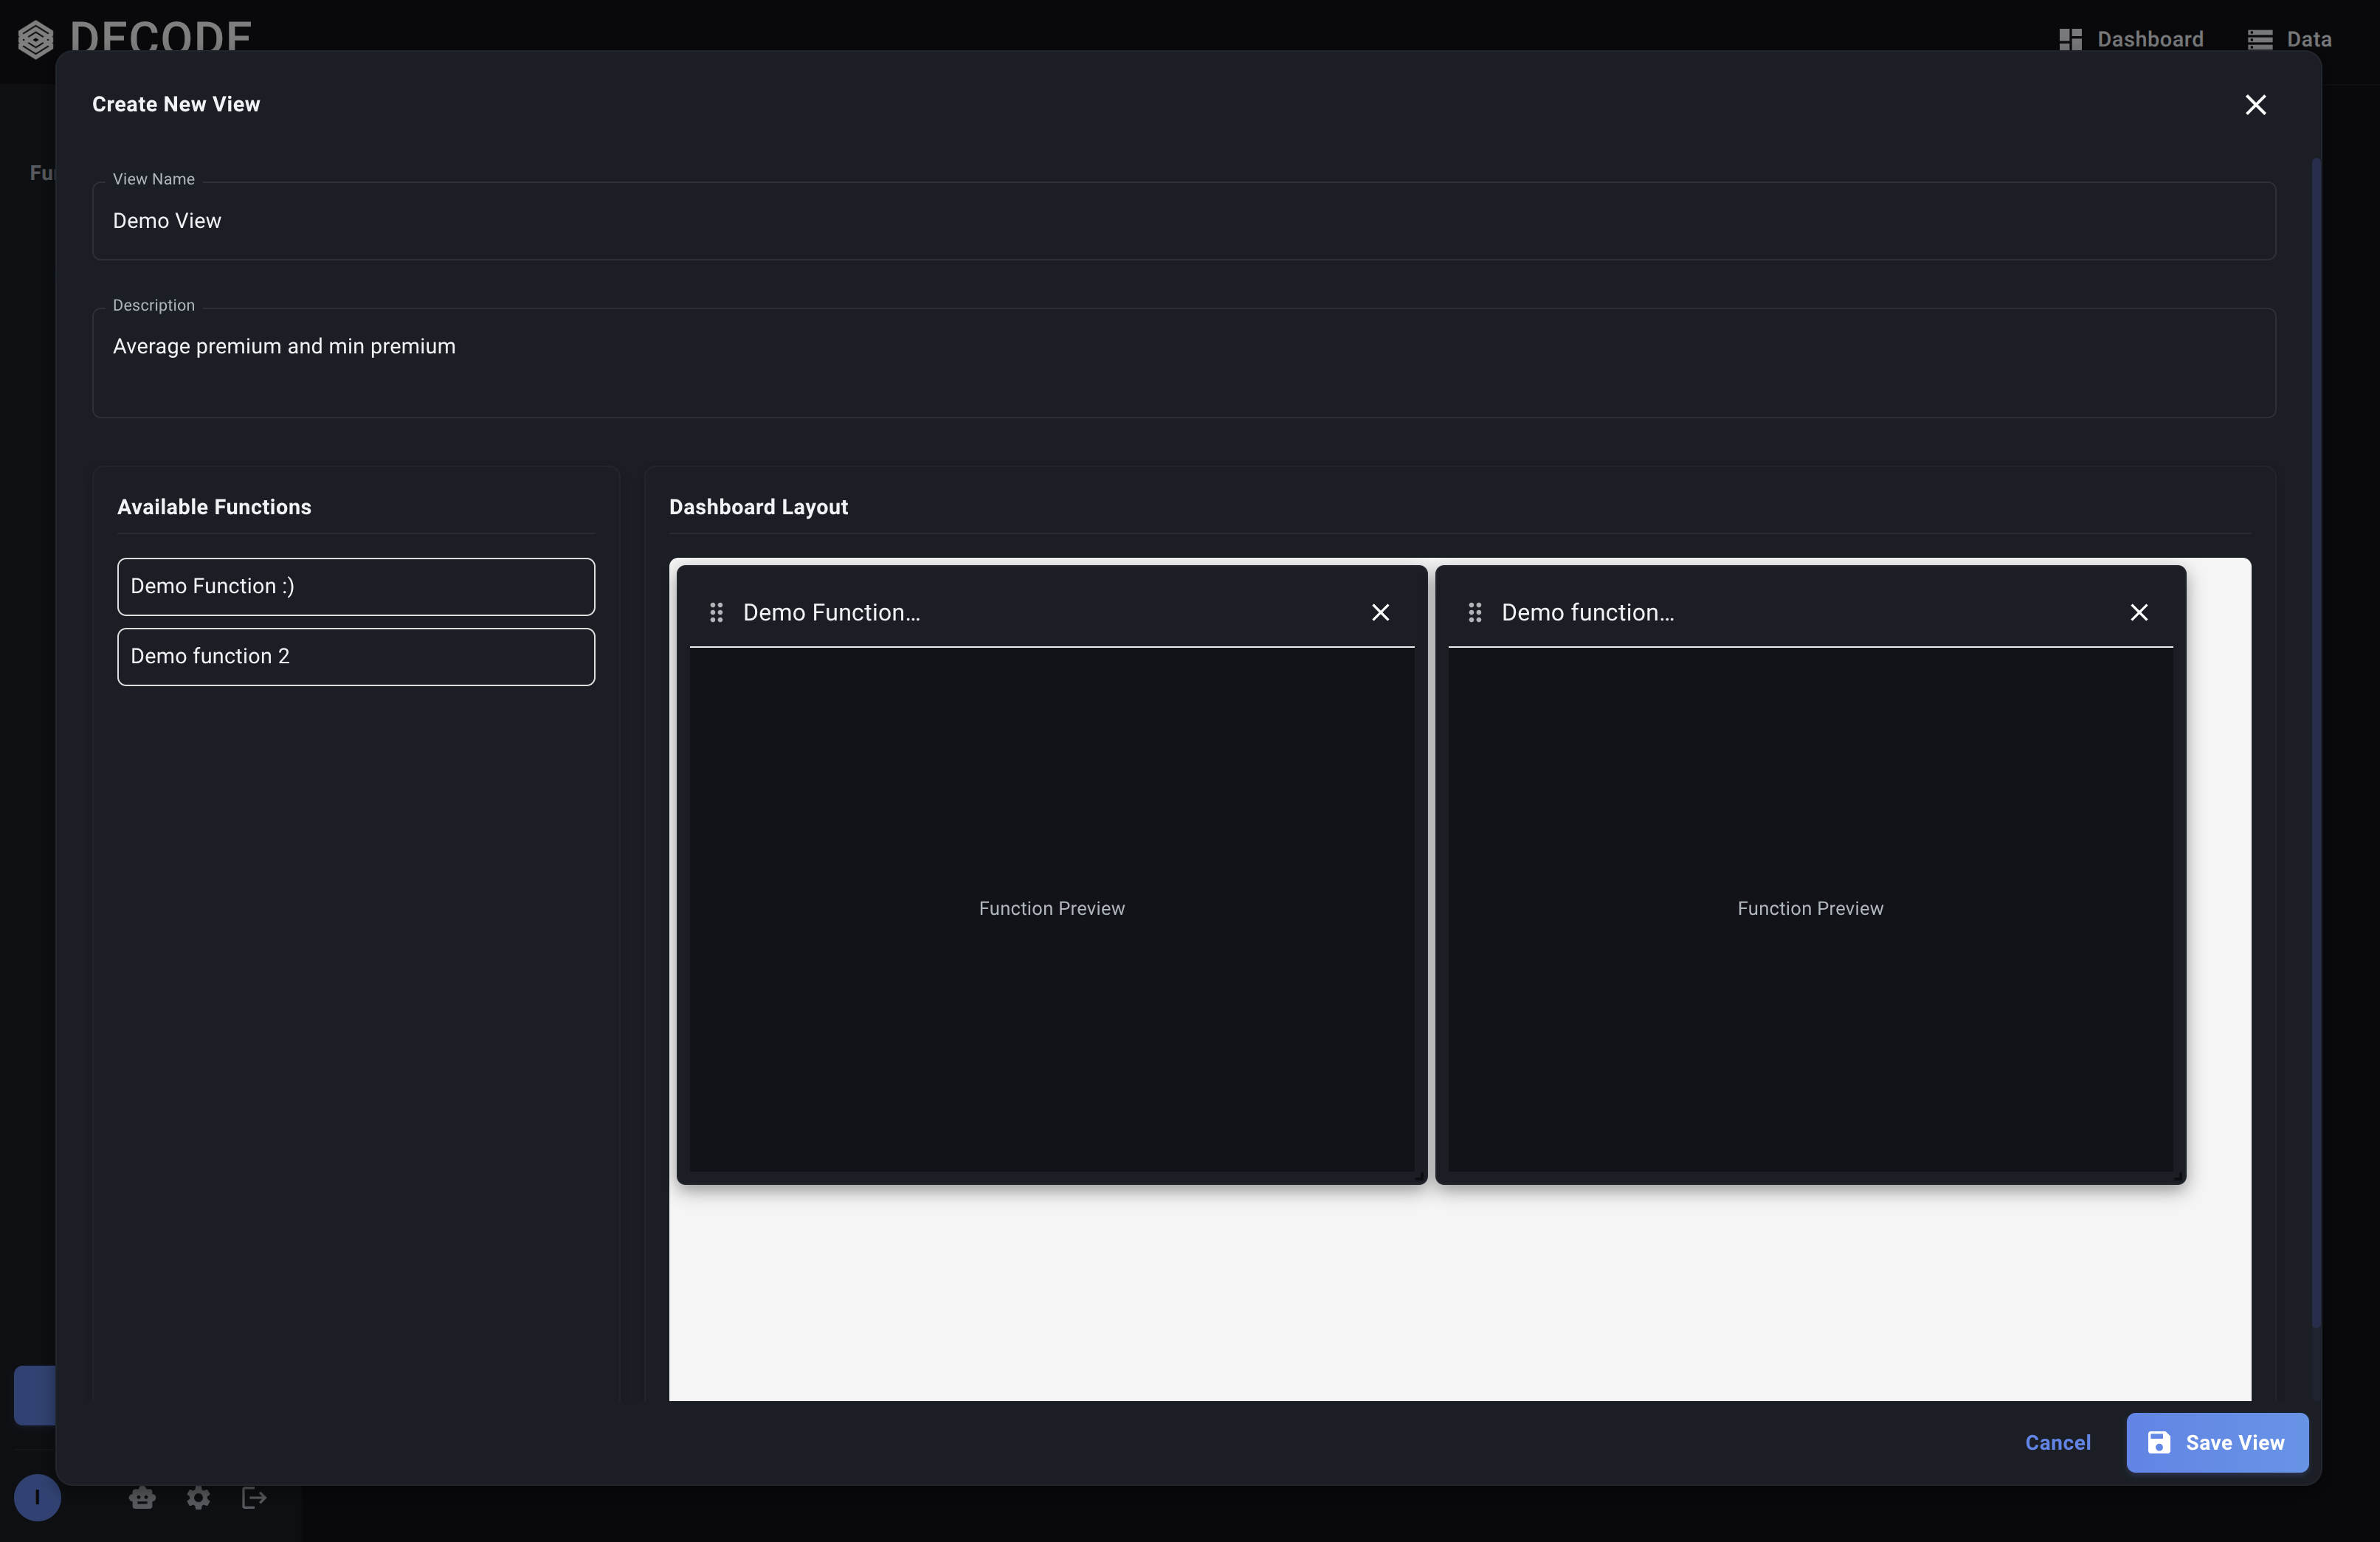
The View Builder Interface
The View Builder has two main sections:
- Available Functions (Left Panel): Lists all your Final Data Functions. You cannot add Draft functions.
- Dashboard Layout (Right Panel): A blank grid representing your dashboard canvas where you will place and arrange functions.
Adding Functions to the Grid
-
Drag and Drop: Find the Data Function you want to add in the "Available Functions" list on the left. Click and hold on the function, drag it over to the grid layout area on the right, and release the mouse button.
-
A placeholder card representing the function will appear on the grid.
- Note: This card is just for layout purposes in the builder; it doesn't show the function's actual output here.
- Repeat: Drag and drop other desired functions onto the grid. You can add multiple instances of the same function if needed (e.g., to run it with different parameters side-by-side later).
Arranging and Resizing Functions
Once functions are on the grid:
- Move: Click and drag the header area of a function card to move it to a different position on the grid.
- Resize: Click and drag the resize handle (usually a small icon or triangle in the bottom-right corner) of a function card to make it wider or taller, spanning more grid cells.
- Remove: Click the Close icon (X) on a function card within the grid to remove that specific instance from the View layout.
Arrange and resize the function cards until you achieve your desired dashboard layout.
Naming and Saving the View
- Enter View Details: At the top of the View Builder dialog, provide:
- View Name: A required, descriptive name for your dashboard (e.g., "Quarterly Performance Review", "Wholesaler X Dashboard").
- Description (Optional): Briefly explain the purpose or content of this View.
- Save: Click the "Save View" button .
What Happens:
- Decode saves the layout configuration (which functions are included, their positions, and sizes) and the View's name and description.
- The View Builder dialog closes.
- Your newly created View will now appear in the "Views" list in the Dashboard Page sidebar.
Your dashboard View is now built! The next step is to Interact with your View by running the functions within it.